Edit your module settings - change the theme (look and feel), learning bite structure, headers, footers etc

This will open your Module Settings.

Roles
-
Producers can edit settings
-
No other program role has access to this icon
Settings - Titles & Languages
Edit the titles of your experience. You can have one title for your program and a different title for the learner, or keep them the same for both.
You can also create experiences in different languages, or the same experience in multiple languages.
Settings - Data & Structure
Learning Models
You can structure your experience one of three ways: single bite, multi-bite or a personalised learning plan. Change these settings via the drop down.

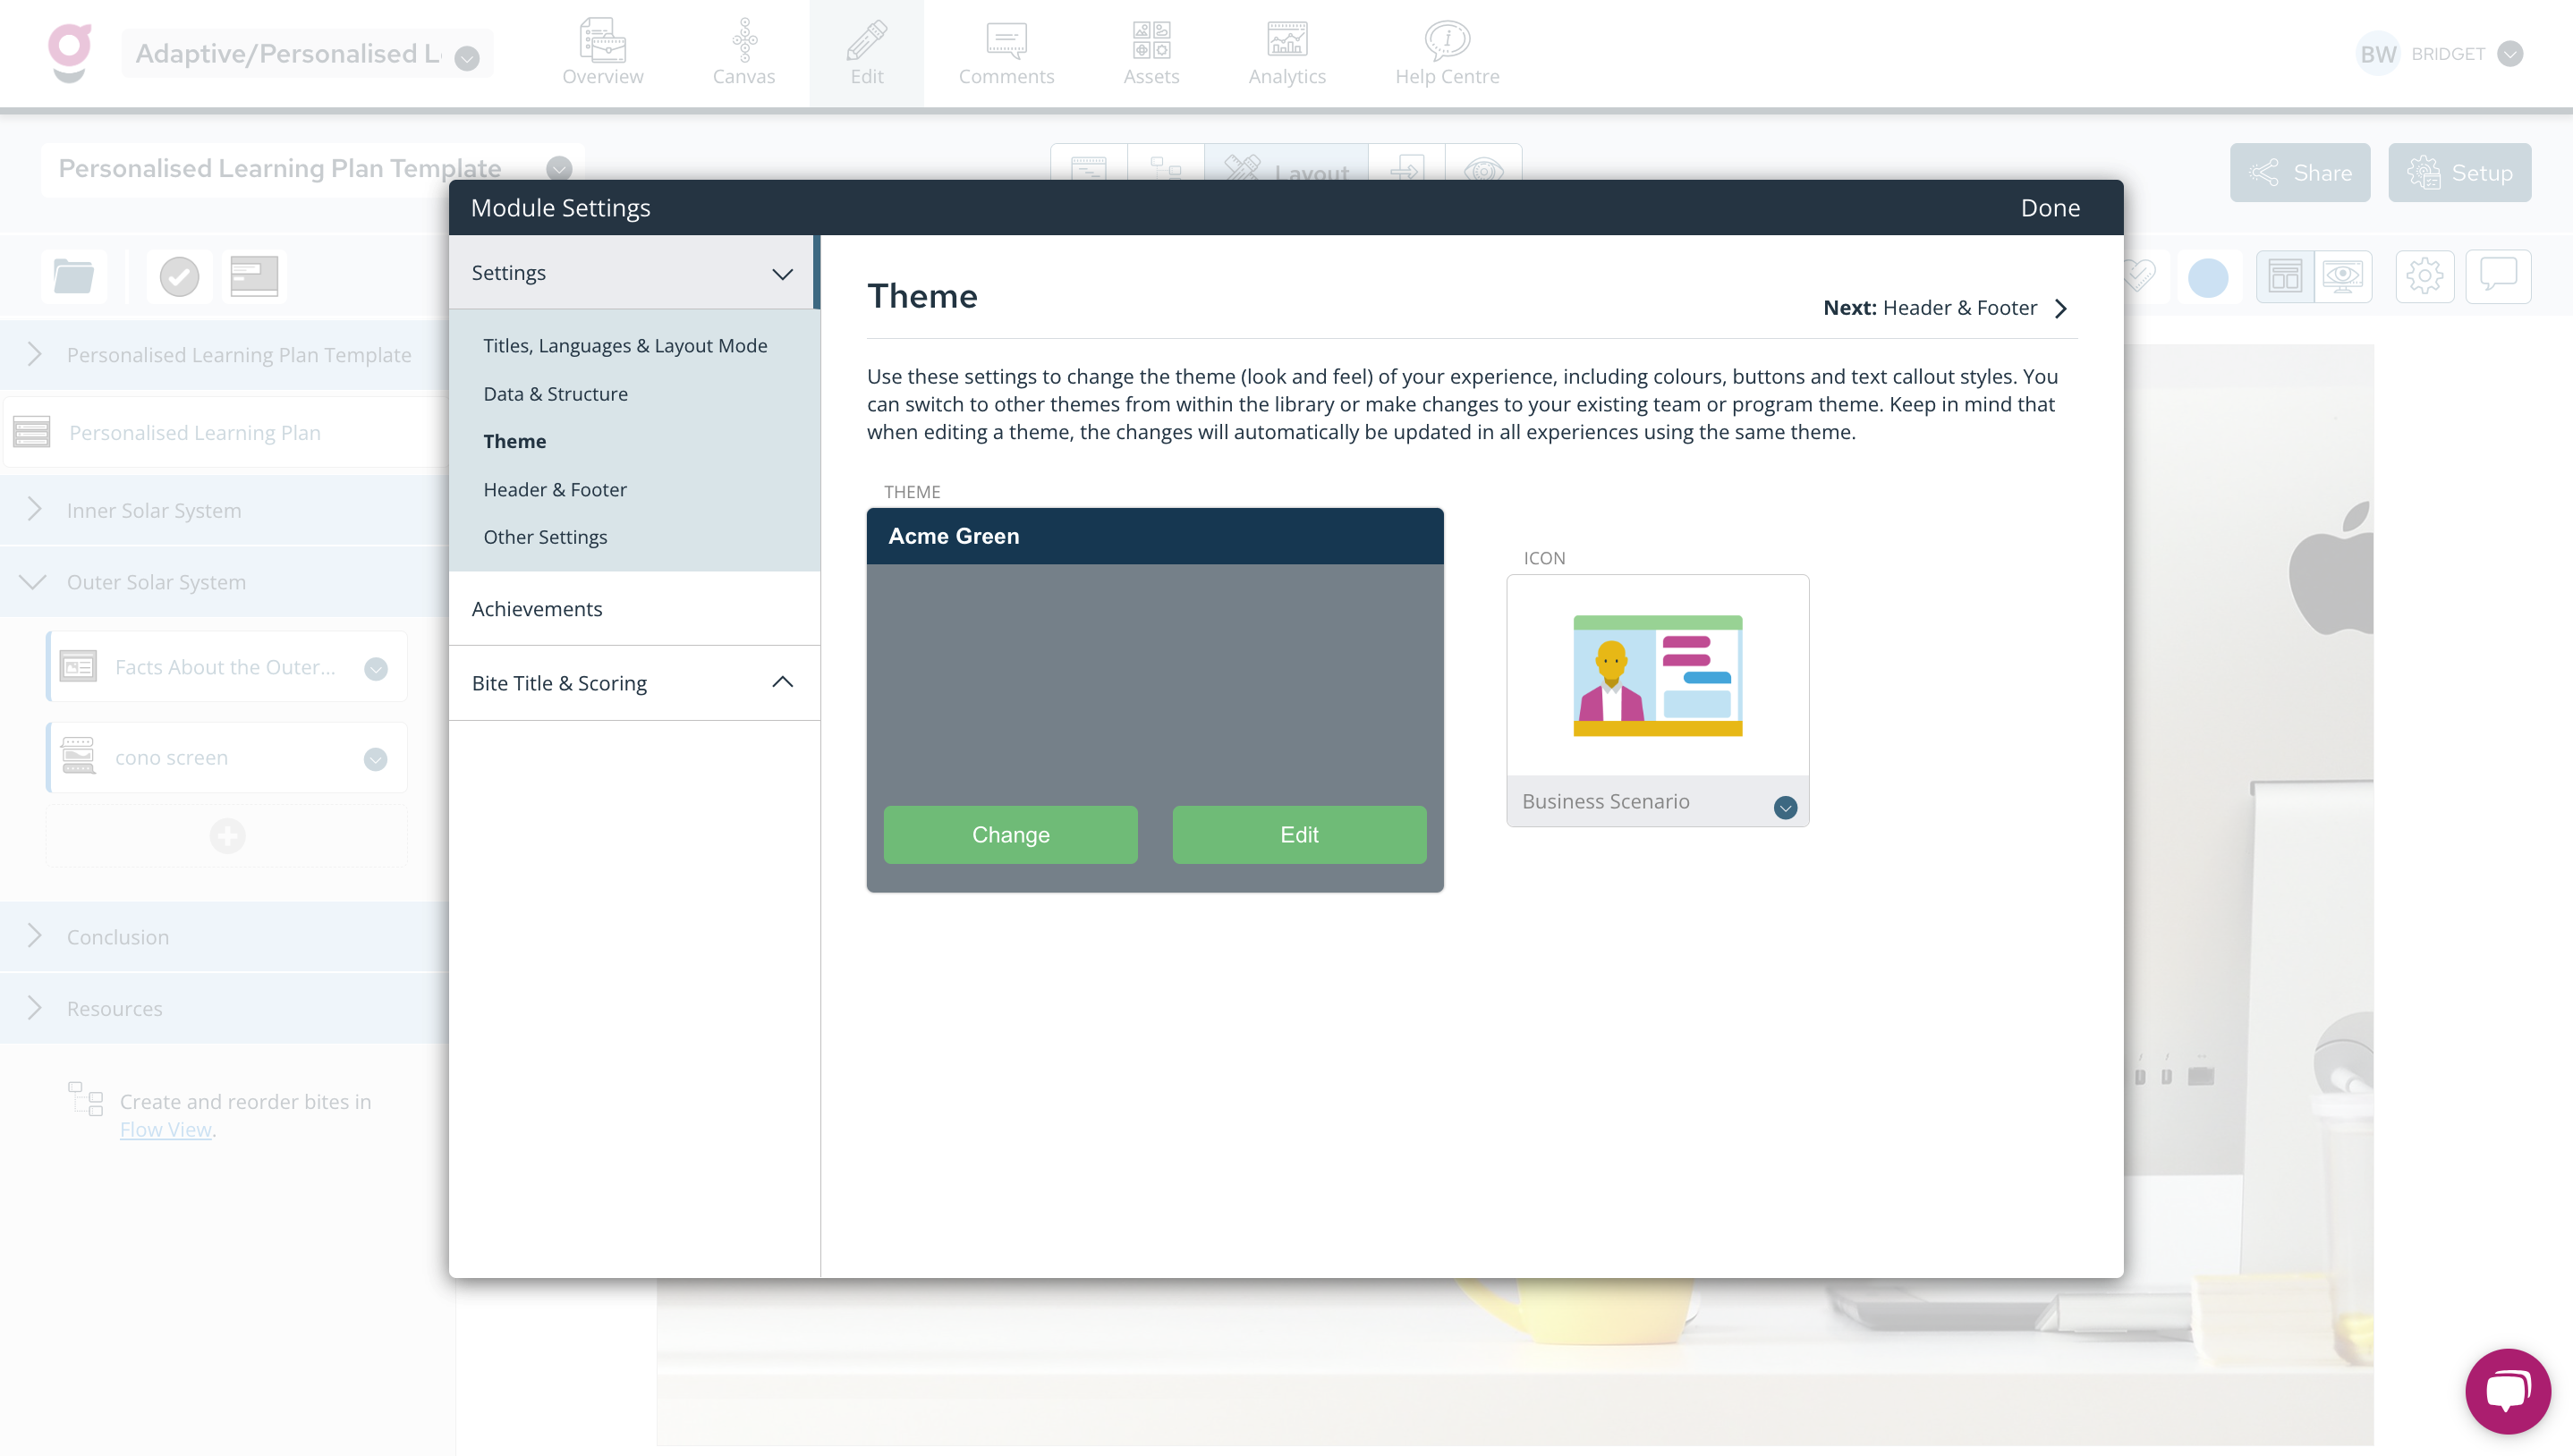
Settings - Theme & Icon

Theme
Instantly change the look and feel of your experience by changing the theme.
-
Change - click the Change button to switch to one of the other themes in your theme library
-
Edit - if you have the TEAM ADMIN role, you have access to edit themes. WARNING: if you edit the theme for this experience, you will be editing the theme for all other experiences which use this theme.
Icon
Icons are a visual element which you can use to identify and organise your experiences. To change the icon for an experience:
-
Use the blue drop down arrow under the existing icon to Select Icon
-
The icon library opens
-
Choose any icon from your icon library or the stock library that best represents your experience.
Settings - Header & Footer

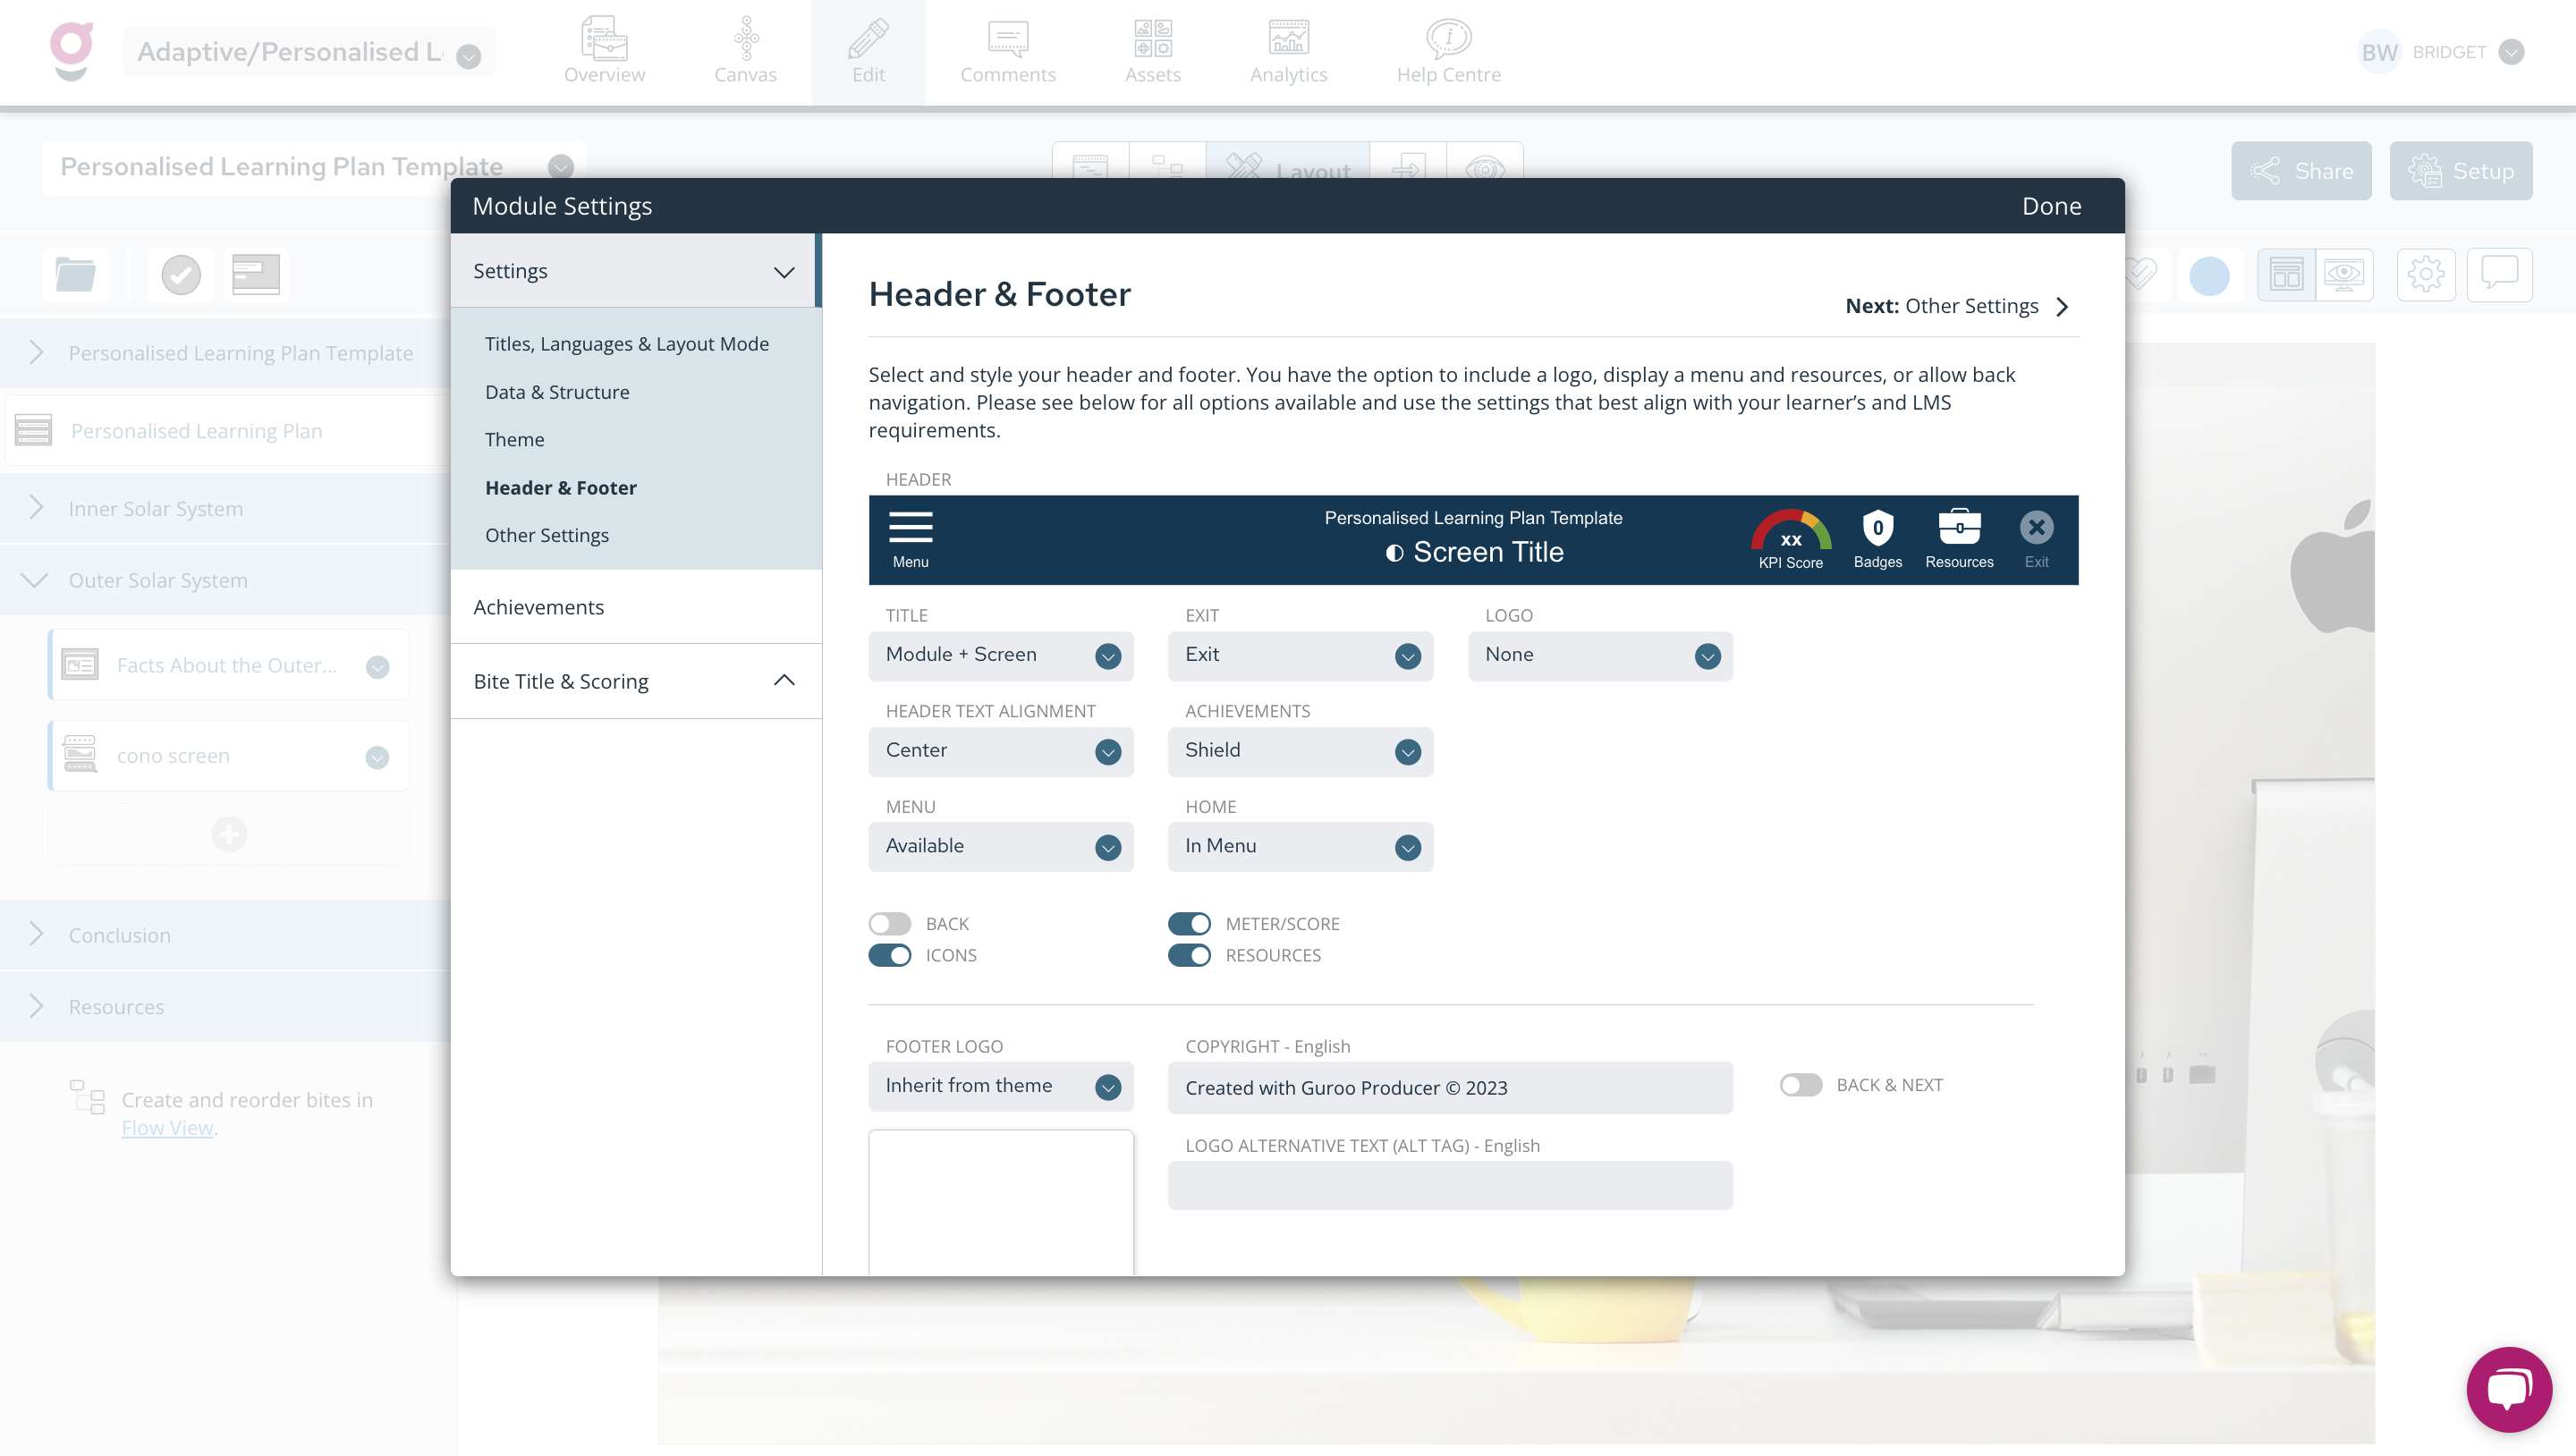
Manage the header and footer navigation elements of your experience using the Header & Footer settings.
As you toggle options on or off, and choose from the different options in the drop downs, the Preview (highlighted in the screenshot) will update automatically so that you can see how your settings will look when published.
Settings - Other Settings

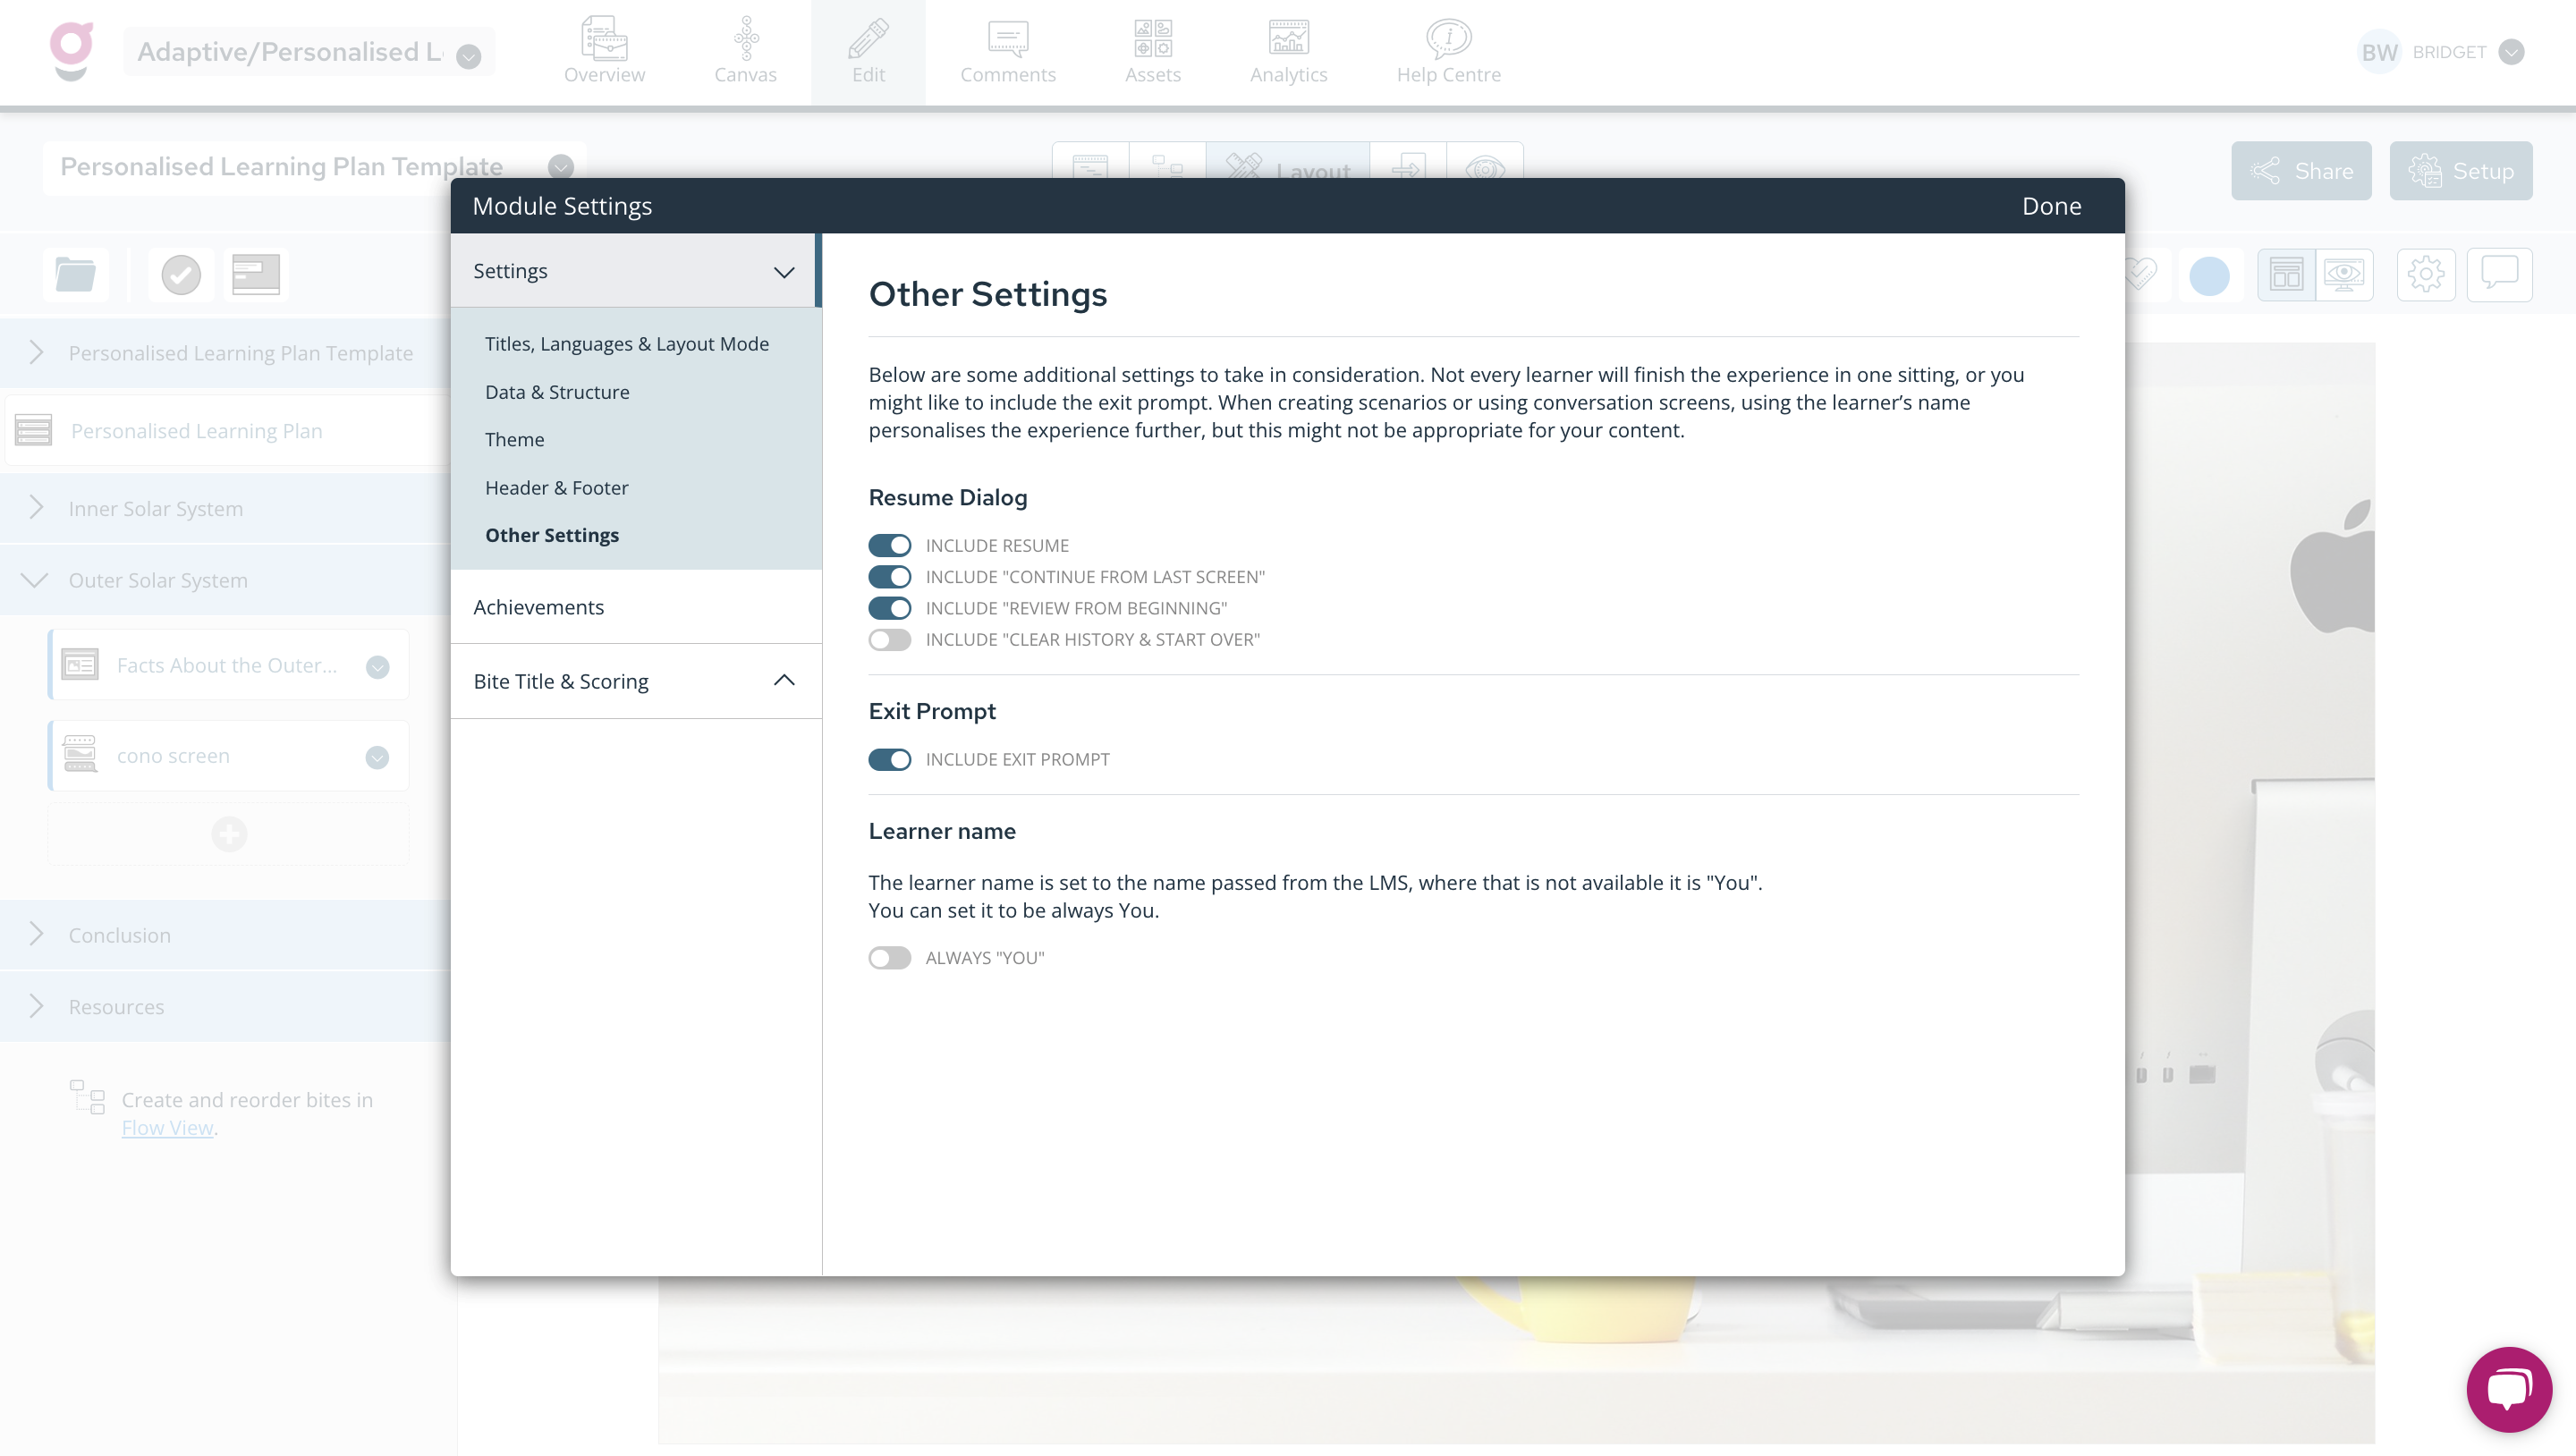
These settings generally relate to options you may want to make available to learners as they exit your experience and resume:
-
Resume - Show a Resume dialog to the learner when they exit the experience part way through and resume at another time
-
Continue from Last Screen - Show a Continue from where you left option to the learner when they resume the experience. This takes the learner back to the screen they were on when they last exited the experience.
-
Review from Beginning - Show a Review from beginning option to the learner when they resume the experience. This allows the learner to return to the start.
-
Clear History & Start Over - Applies when you publish your experience as a SCORM file. Include a Clear history and start again button if you want to allow learners to clear their tracking data (bookmarks and question responses) from the LMS hosting the experience.
-
Learner Name: Always You - when you publish your experience as a SCORM file, the LMS that hosts/delivers the file will pass the learner's name to the experience, so that it is displayed on conversation screens and the exit/resume dialogs. If you do not want to display the learner's name, change this setting and 'You' will be displayed instead.
The settings in the above screenshot are the default settings.